Machine Learning on Azure
A repository of exercises to support the training.
Module 11: Data Labeling Project
Create an Azure Machine Learning data labeling project
A common task when developing a custom object detection model is the need to process unlabeled image data so that it can be converted to a labeled dataset for model training and validation purposes. Unlabeled data often features various samples that reflect the type of data that would be captured at the site where the object detection model is to be employed. This data could include subtle transformations, for example, introduction of "noise" into the image data to produce a more robust training set. Azure Machine Learning Data Tools in Azure Machine Learning studio allow teams to manage their collections of unlabeled data into labeled datasets that accommodate the classes that would be detected by the trained object detection model.
Create an Azure Machine Learning data labeling project
-
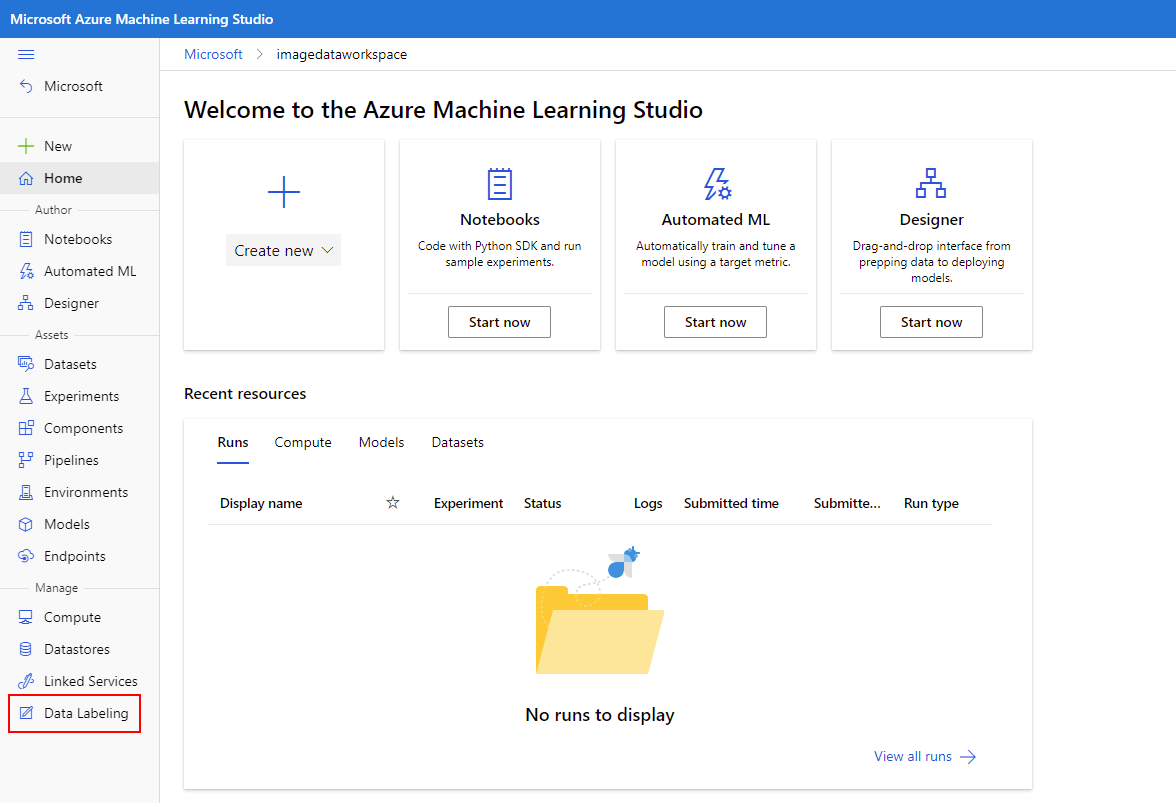
If you haven't already launched the Azure Machine Learning studio from the Machine Learning Overview mentioned at the end of the previous section, sign in to Azure Machine Learning studio now, and select your workspace.
-
On the left-hand pane, locate the Manage section and select Data Labeling.
-
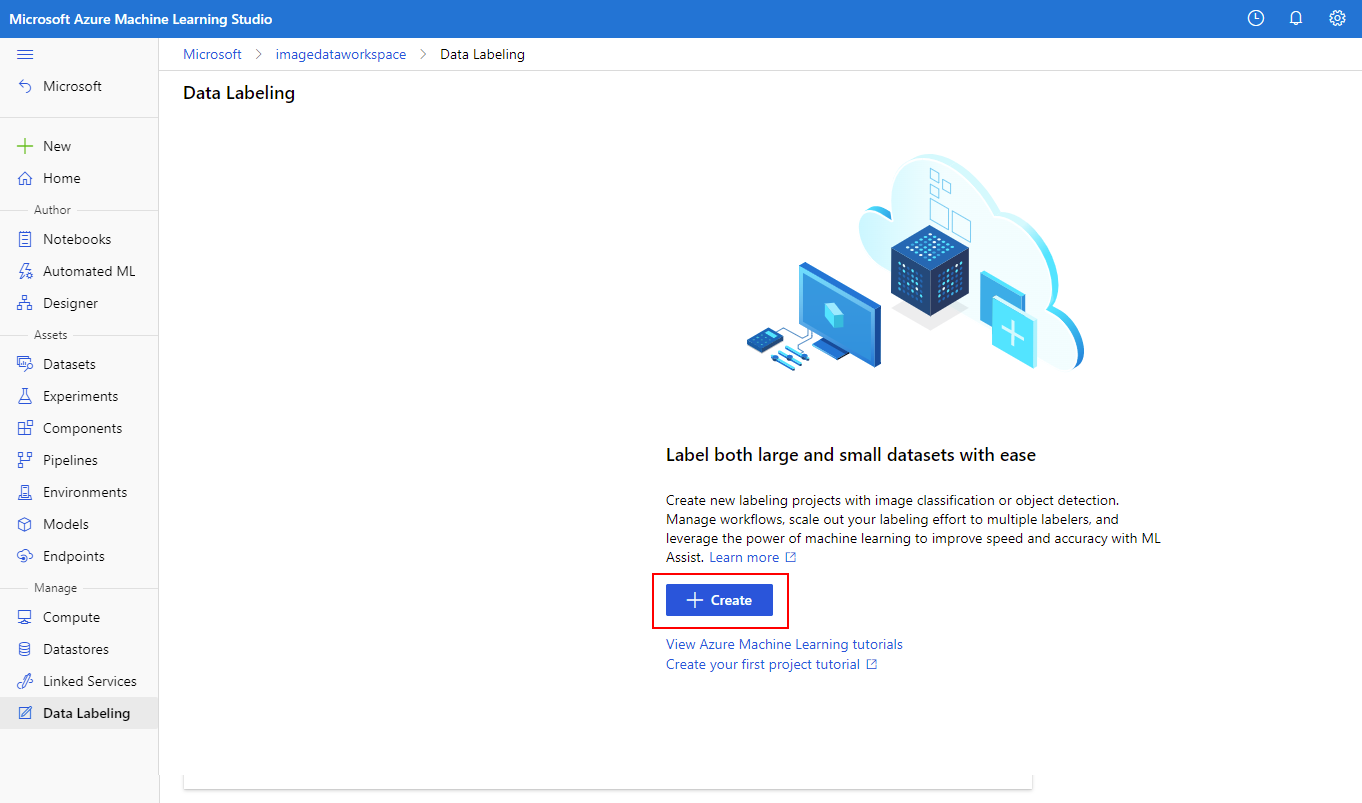
On the resulting screen, select + Create.
-
Under the Project details section, give your project a name that is specific to the particular detection task at hand and select Object Identification (Bounding Box) from the menu, then select Next.

-
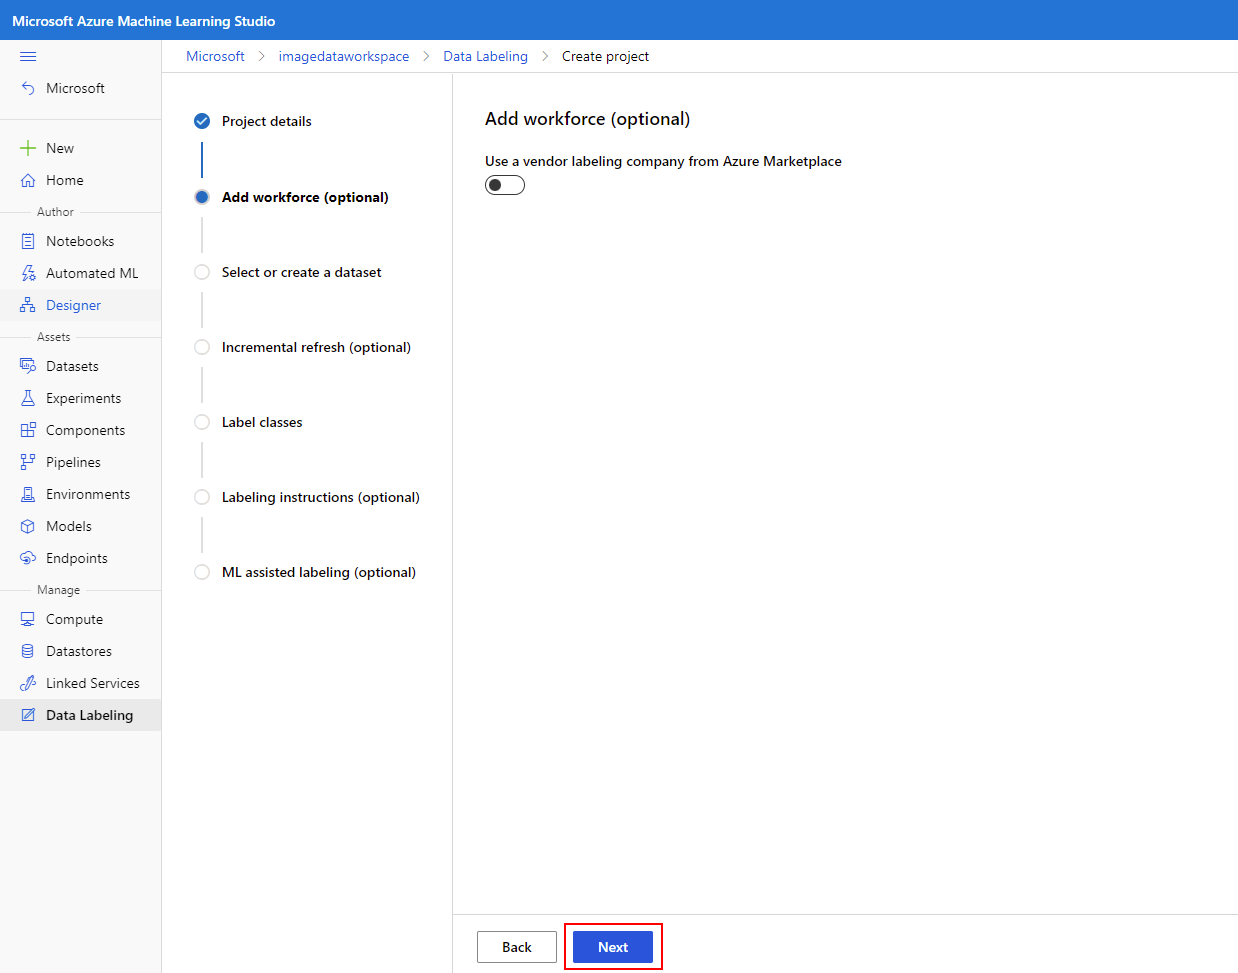
In the Add workforce (optional) screen, we'll leave the option disabled and select Next to continue.
-
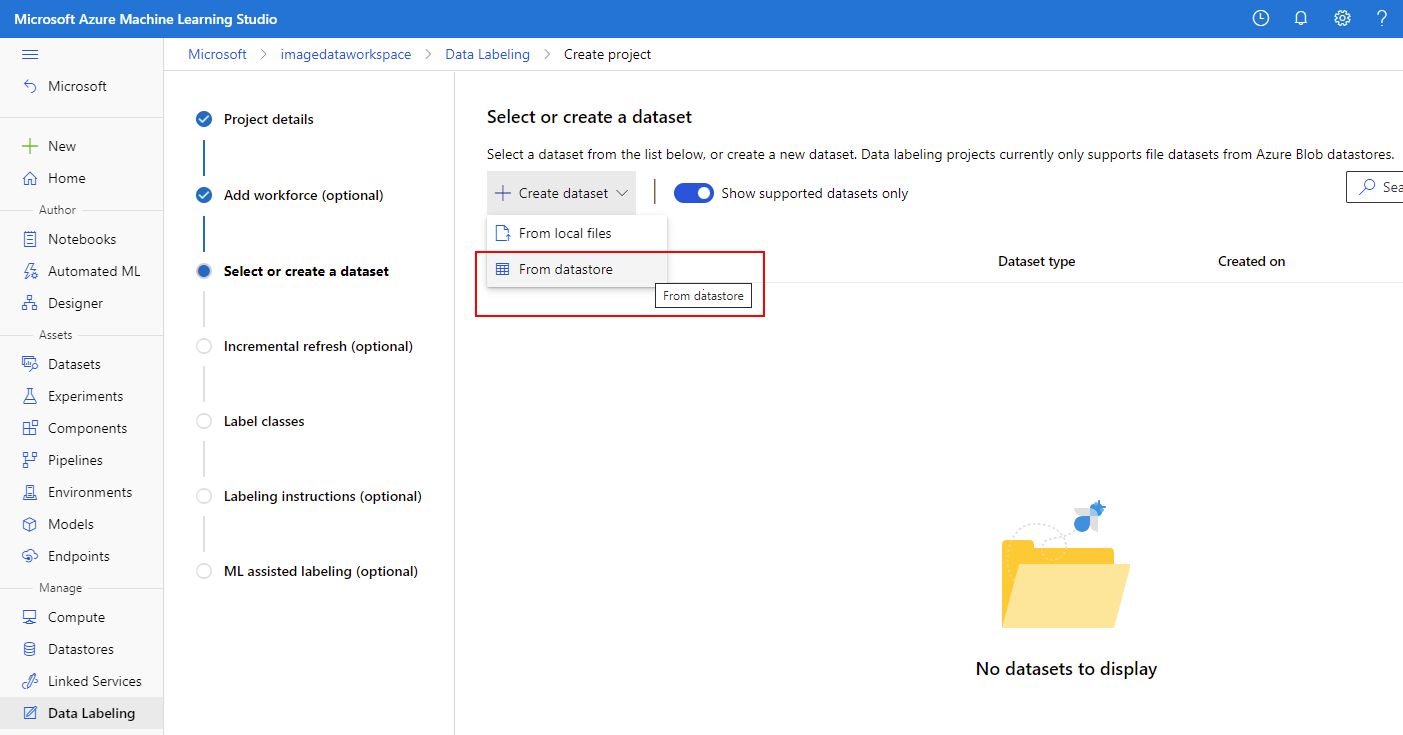
When prompted to Select or create dataset choose + Create dataset and select the From datastore option.
-
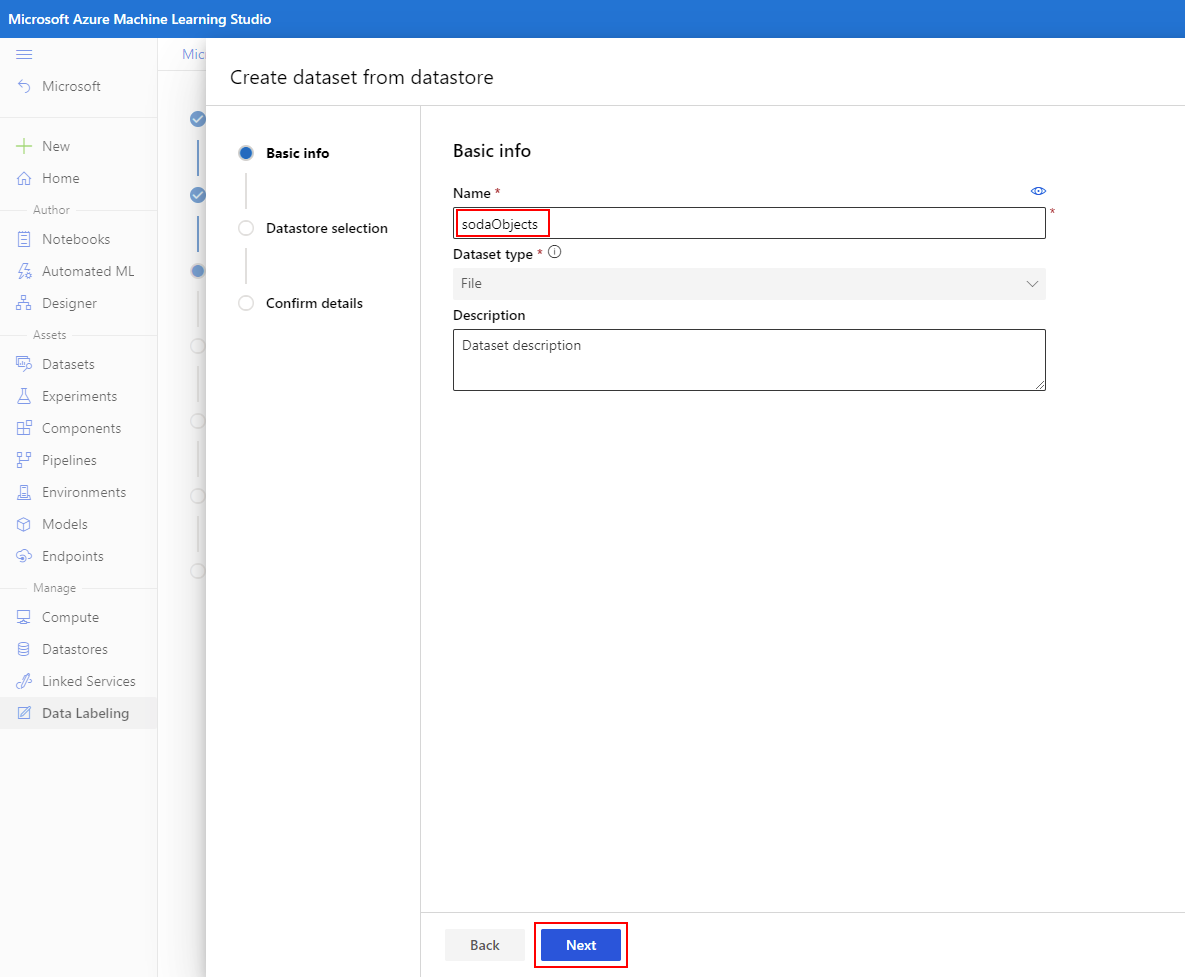
Give your new dataset the unique name, for example, sodaObjects that reflects the images captured in support of the detection task and select Next.
-
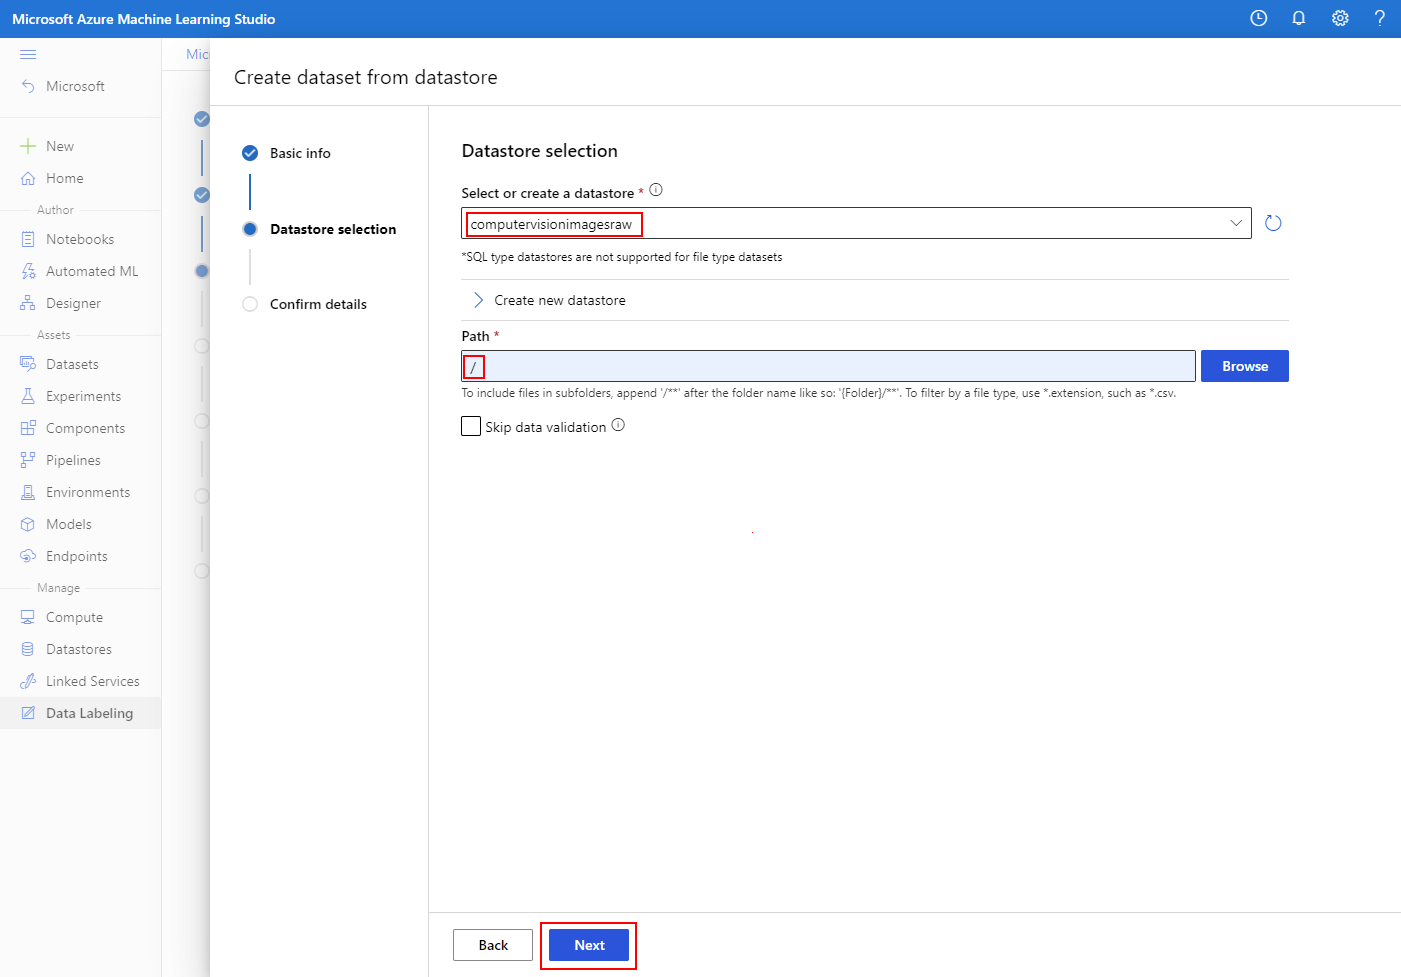
Under Datastore selection, choose the datastore name that you added previously, which contains the untagged image data. Here, you can also provide a wildcard path if you wish to pull only images from specified partitions. If you wish to pull all images from the container, enter / as the path and select Next.
-
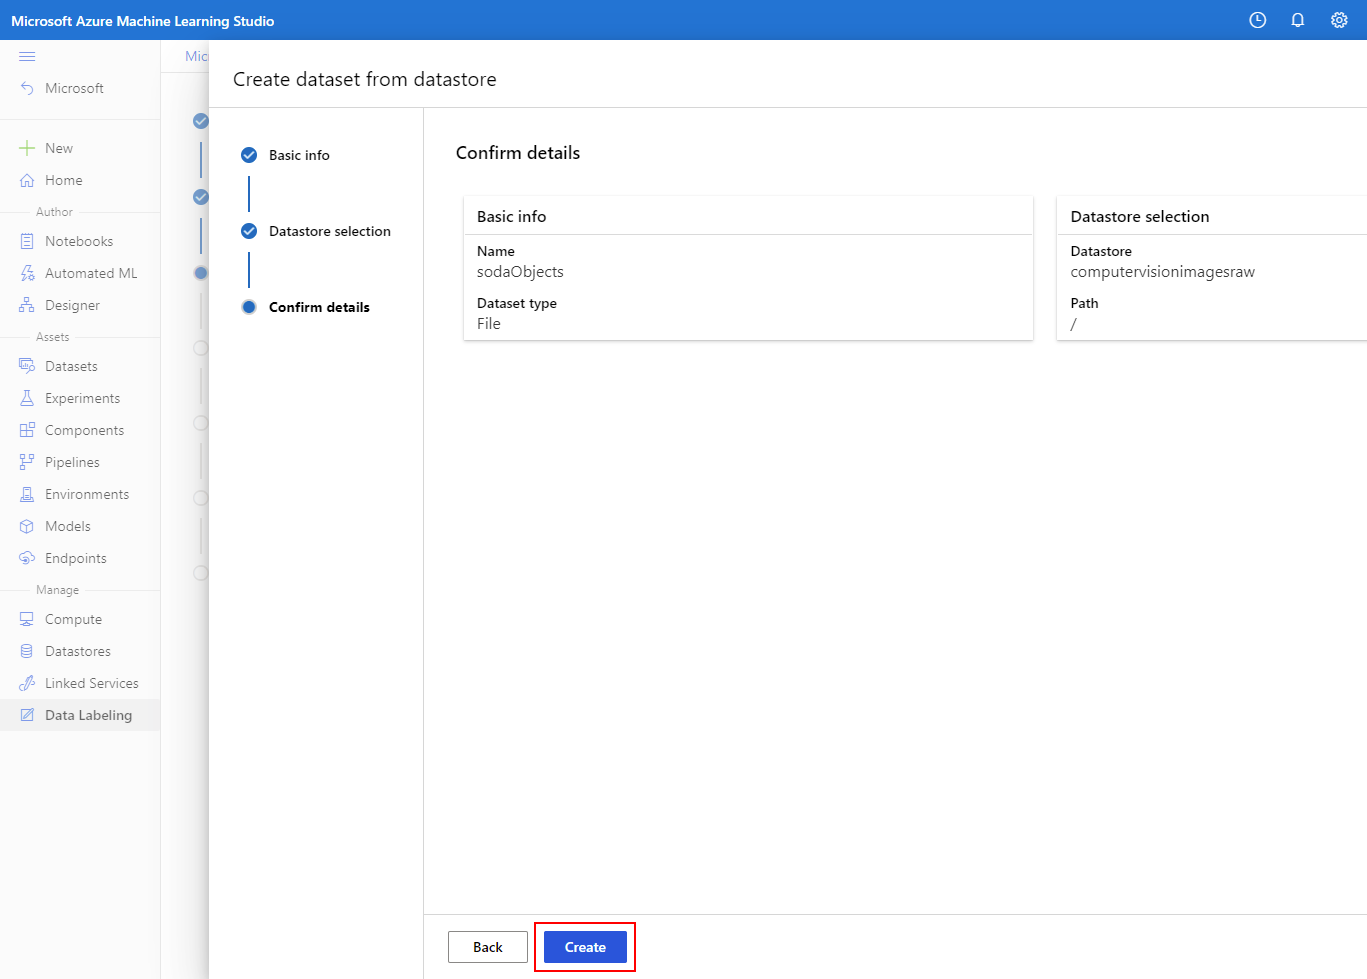
Confirm details about your new dataset and select Create.
-
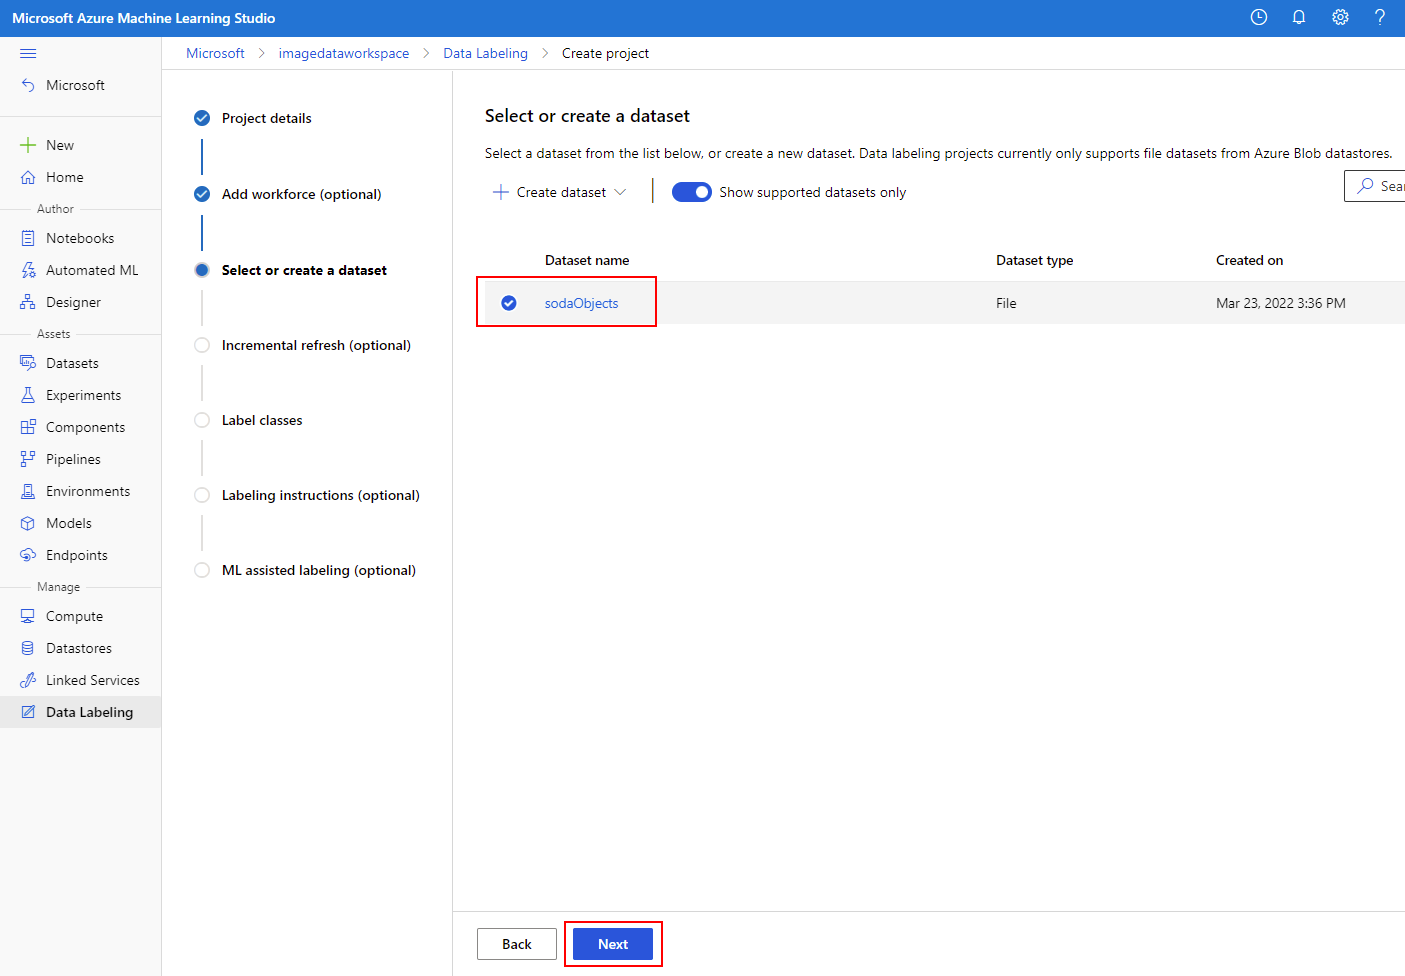
Choose the newly created dataset, then select Next.
-
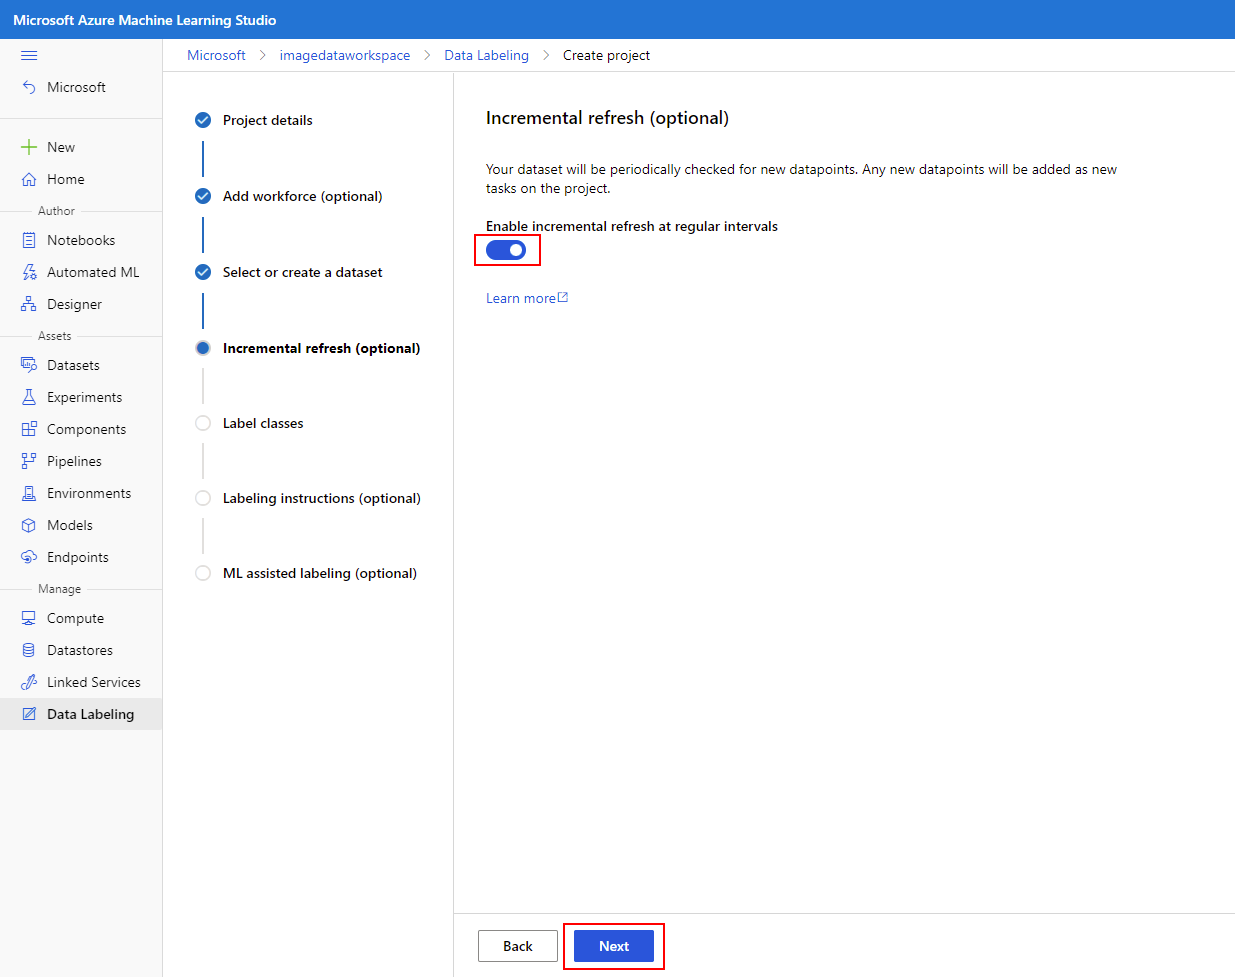
You'll be prompted to Enable incremental refresh at regular intervals. This feature will automatically add newly captured images to your data labeling project. Enable this option as shown, then select Next.
-
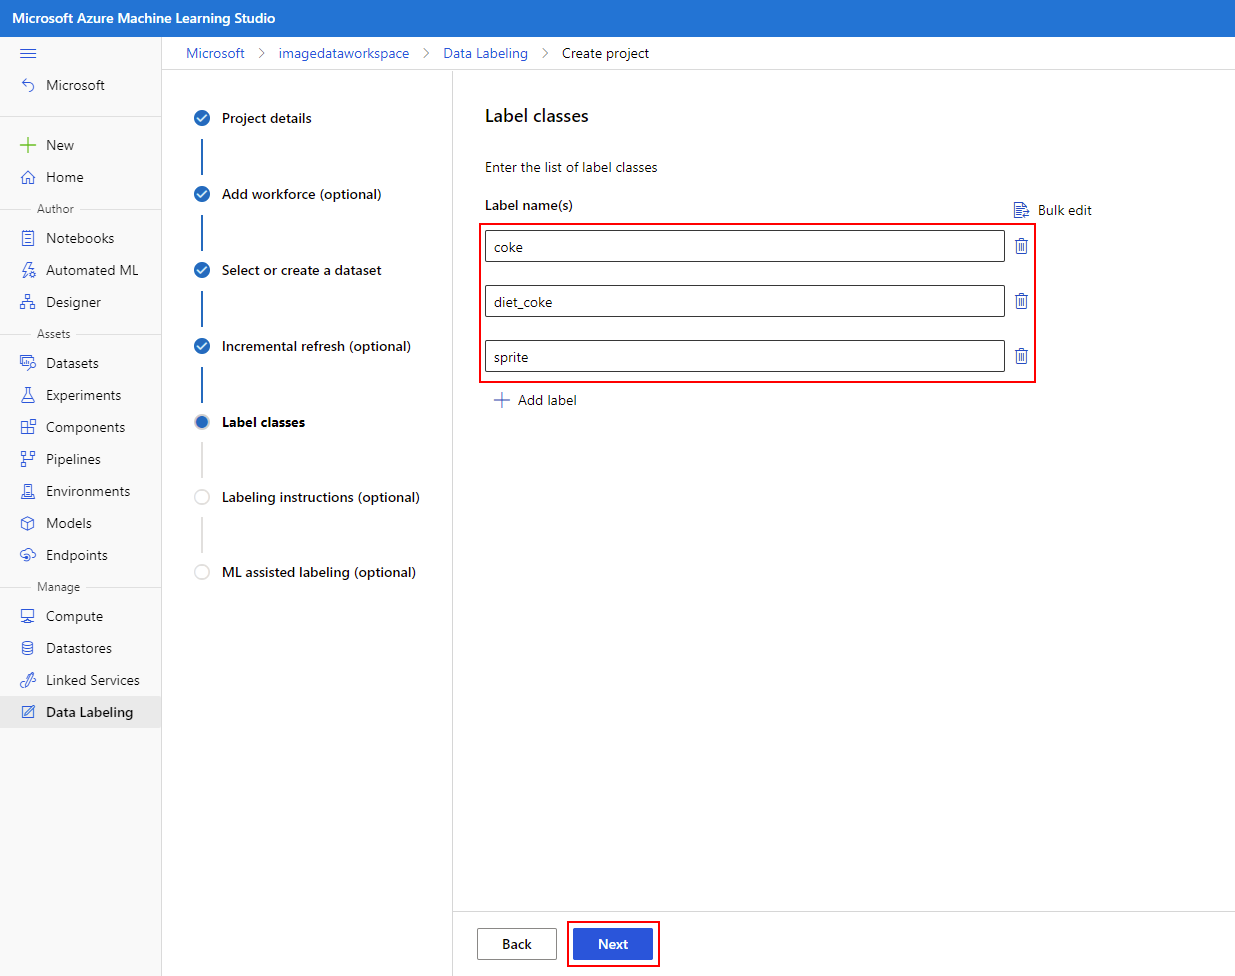
On the next panel, add label classes for all objects or defects you wish to detect - include positive and negative classes here.
-
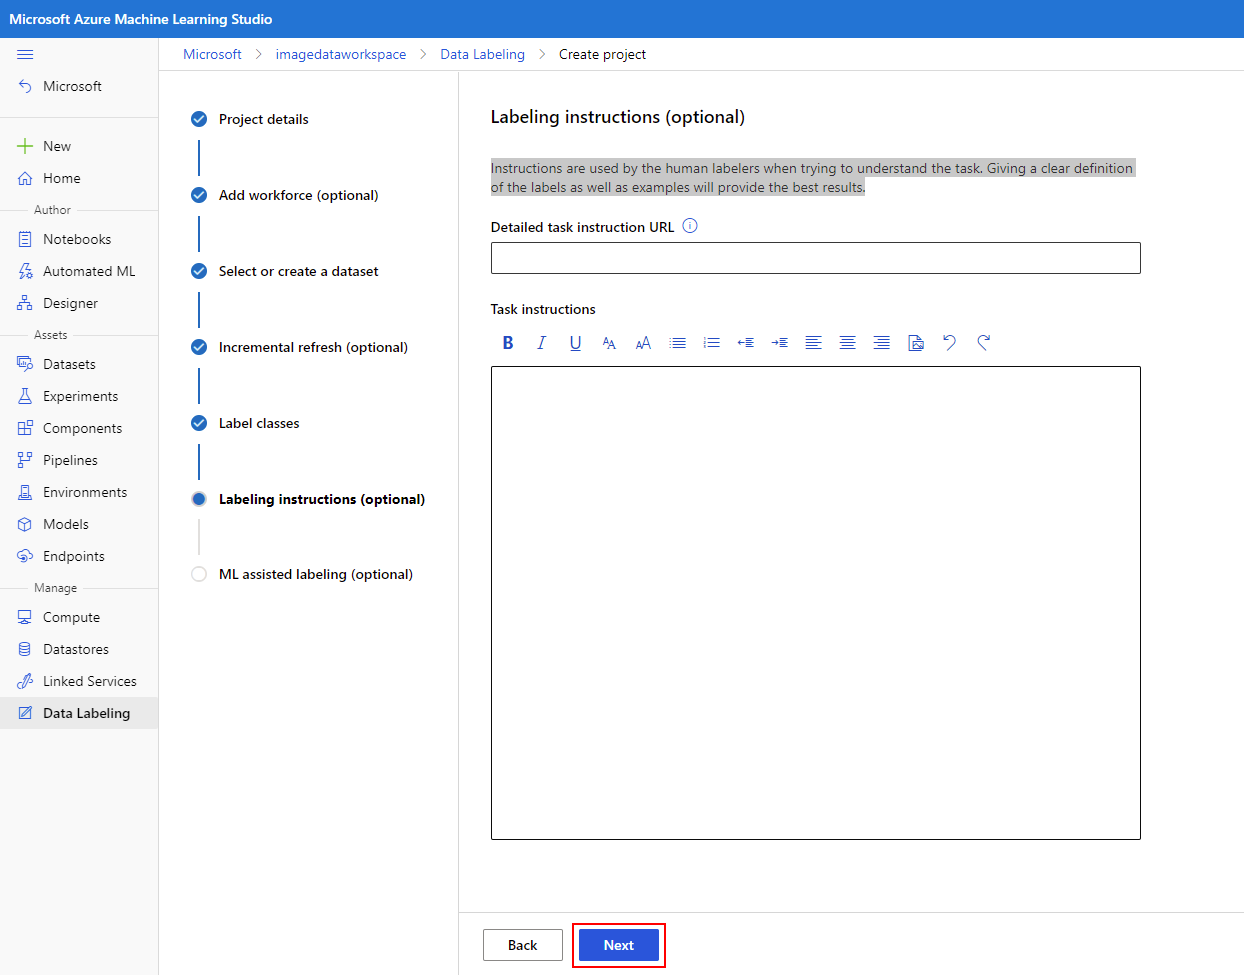
You may optionally add labeling instructions in the following section, we'll leave this section empty and select Next.
-
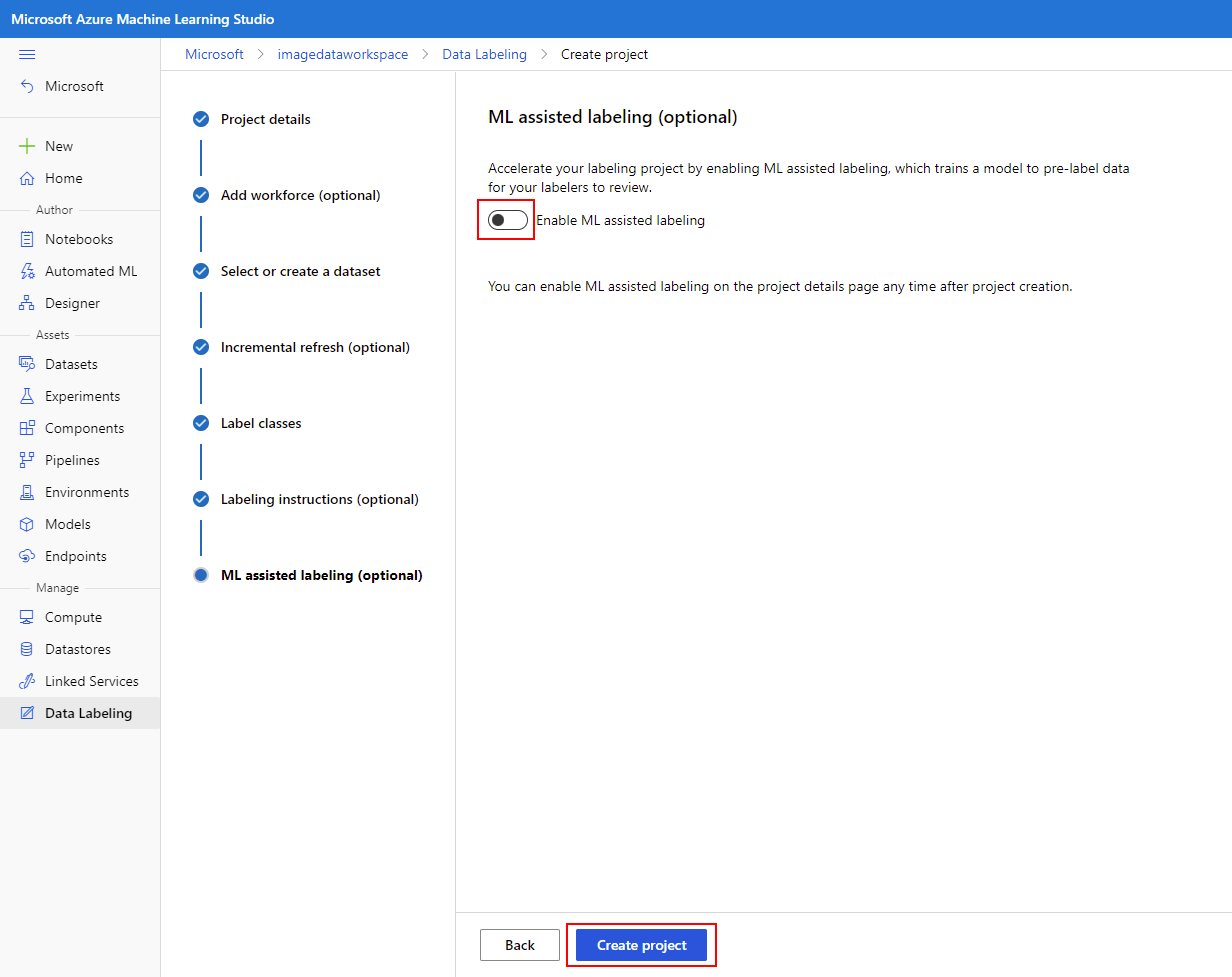
You can optionally use ML assisted labeling which will accelerate your data labeling process, particularly as more data is captured. For this Learning Module, we won’t be using this option. Disable the option as shown then select Create project.
Label images with Azure Machine Learning data labeling tools
We're now ready to begin working with our newly created Azure Machine Learning Data Labeling project. To prepare our images for training an object detection model, we'll need to label our image data appropriately. This task will involve drawing a bounding box around the objects of interest in our dataset, which will be stored as metadata. This metadata will then be referenced during training to allow us to gauge the accuracy of our model as it is trained over time. The accuracy of our model is verified by referencing our labeled image data to determine that detected objects are being identified within the regions we've defined.
Label images with Azure Machine Learning data labeling tools
-
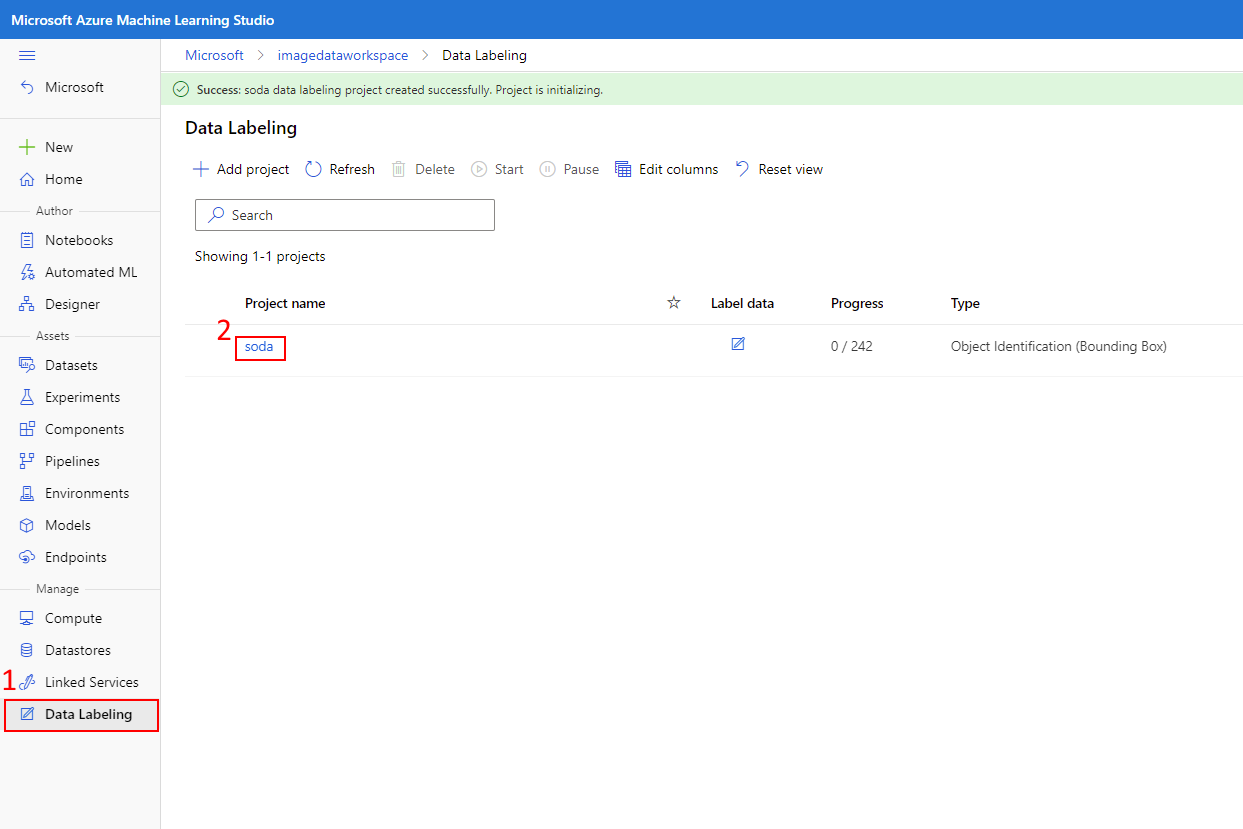
Navigate to your Azure Machine Learning Data Labeling project by locating the Manage section on the left-hand pane and select Data Labeling, then select your newly created project.
-
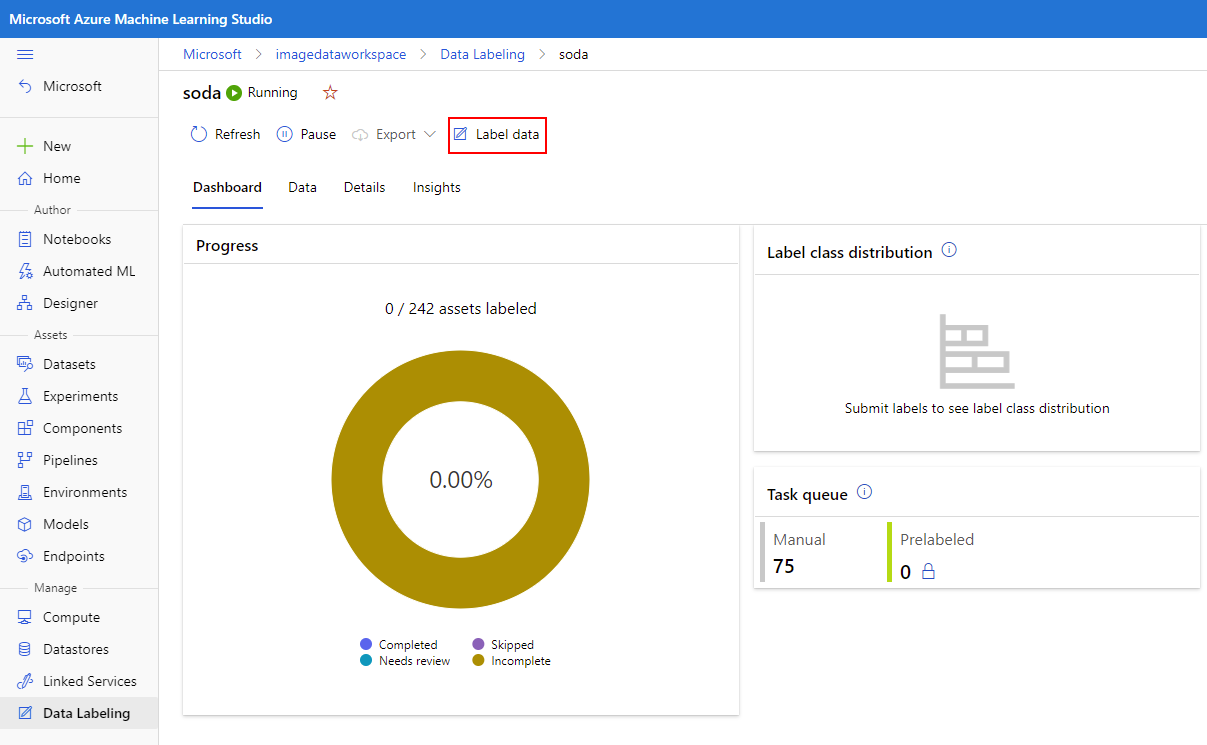
On the resulting screen, select the Label data button.
-
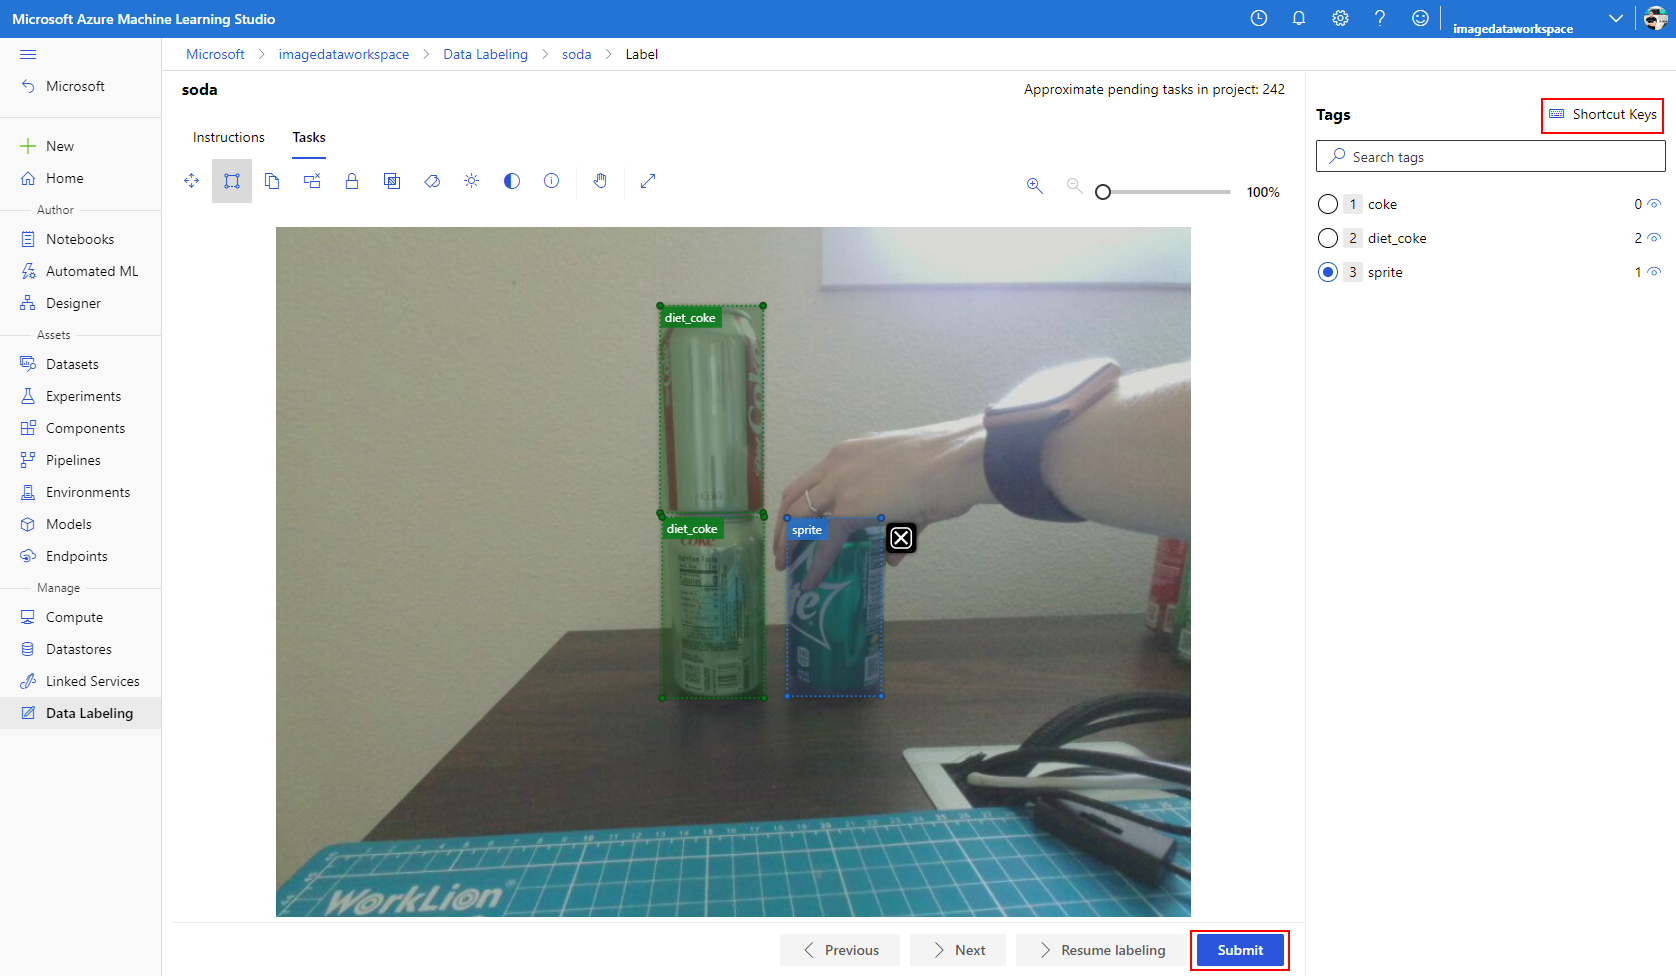
The previous step will open a labeling utility, which will allow you to draw bounding boxes and tag objects/defects present in your images. There are multiple keyboard shortcuts available, which can be reviewed under the Shortcut Keys panel. As you label images, select the Submit button to save the labeled image. Repeat this process to label a minimum of 10 images (10 is the minimum amount of labeled samples required by aAzure Machine Learning Studio to successfully train an object detection model in an experiment task).
Export a labeled Azure Machine Learning dataset
We'll now export our labeled dataset. This task will produce a json file stored in an Azure Blog Storage container assigned to our Azure Machine Learning studio instance. The file contains url references to the raw image data and the label metadata for each image. We'll reference this dataset later to use in model training through a Jupyter Notebook instance.
Export a labeled Azure Machine Learning dataset
-
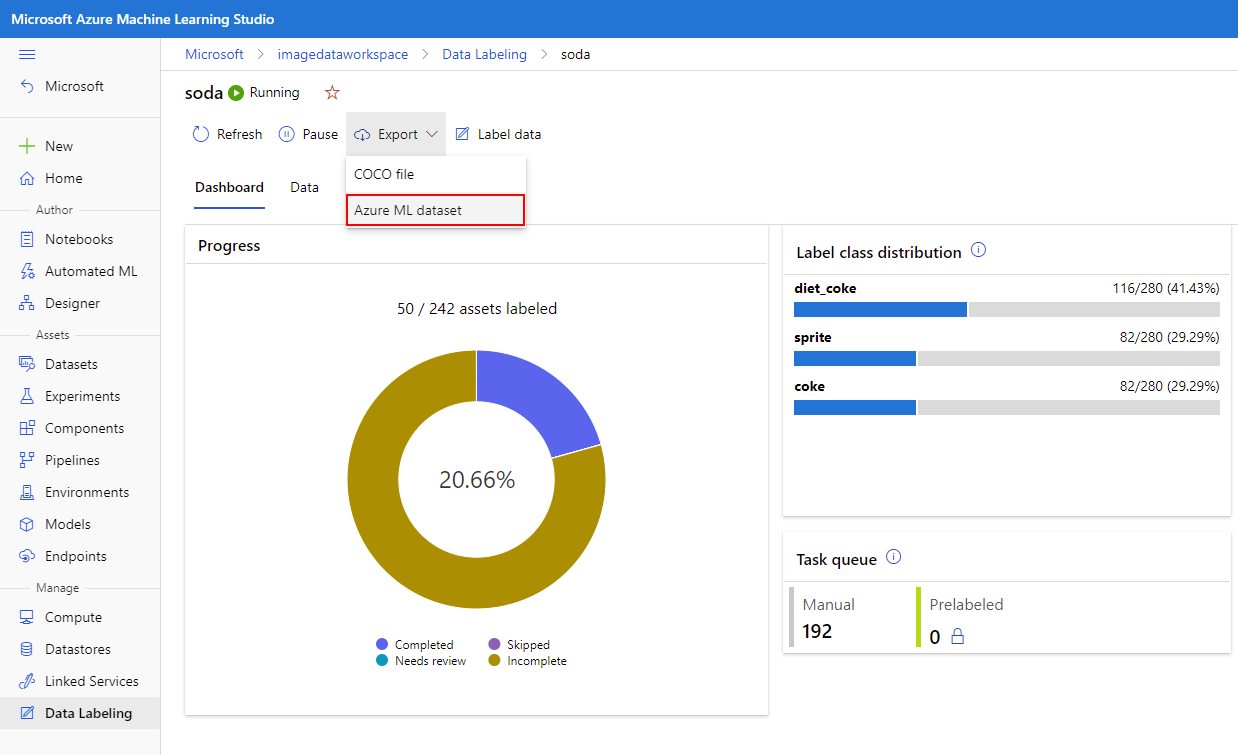
After labeling all of your images (remember to label a minimum of 50 in order to prepare for training), we're now ready to export an annotation file. Navigate to the data labeling project and select Export then select Azure ML Dataset. This operation will export your image dataset as an AutoML-compatible Azure ML dataset named according to the format 'NAME_DATE_TIME'.
-
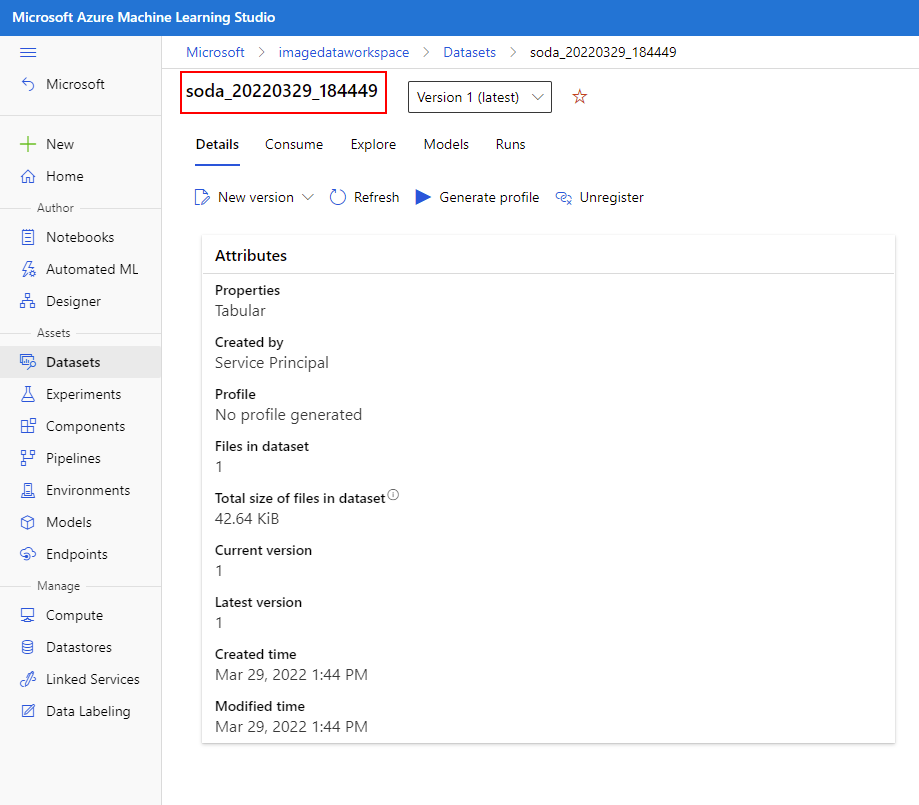
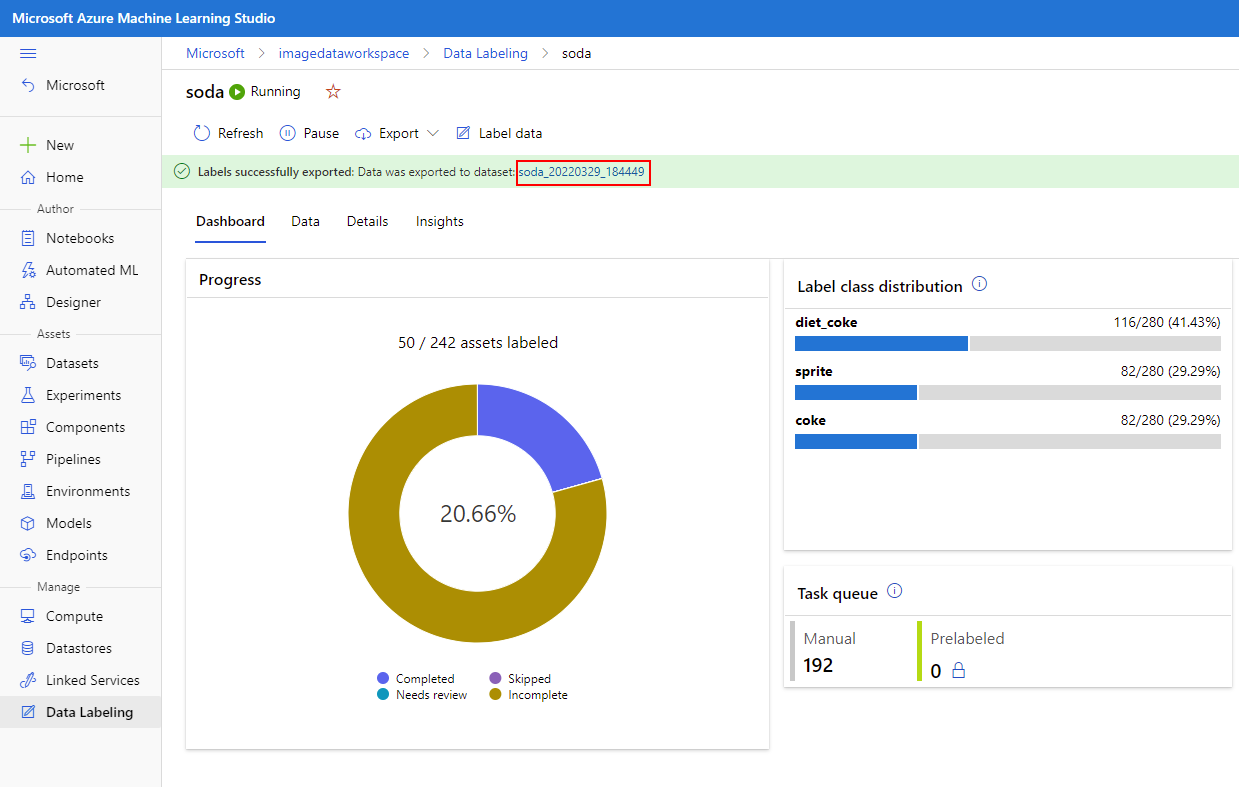
Select the exported dataset.
-
The previous step will open a screen showing the newly created dataset. Copy the name of the Dataset and store it somewhere secure and accessible on your development machine as we'll use this value in the next module of the Learning Path. In this example, the name is soda_20220329_18449.
